Snipping Tool & DL
Did you know that you can use the Snipping Tool to easily illustrate where and which documents need to be deleted or moved in DL?
For example, if we needed to delete narrative MMM090319.pdf from Mickey Mouse’s file, you could attach a screen shot of the location as pictured here.
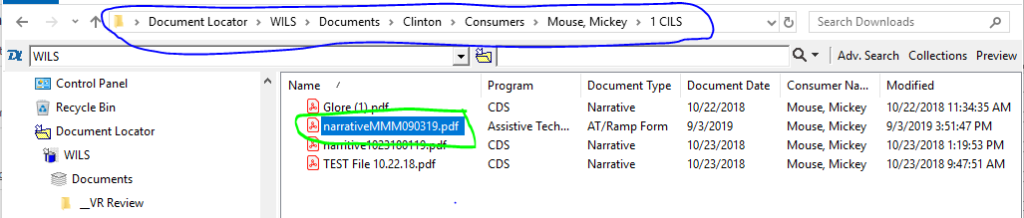
The path to the file is circled in blue and the specific file is circled in green. This simply demonstrates the Pen and Highlight tools. Feel free to use them but it is not required.
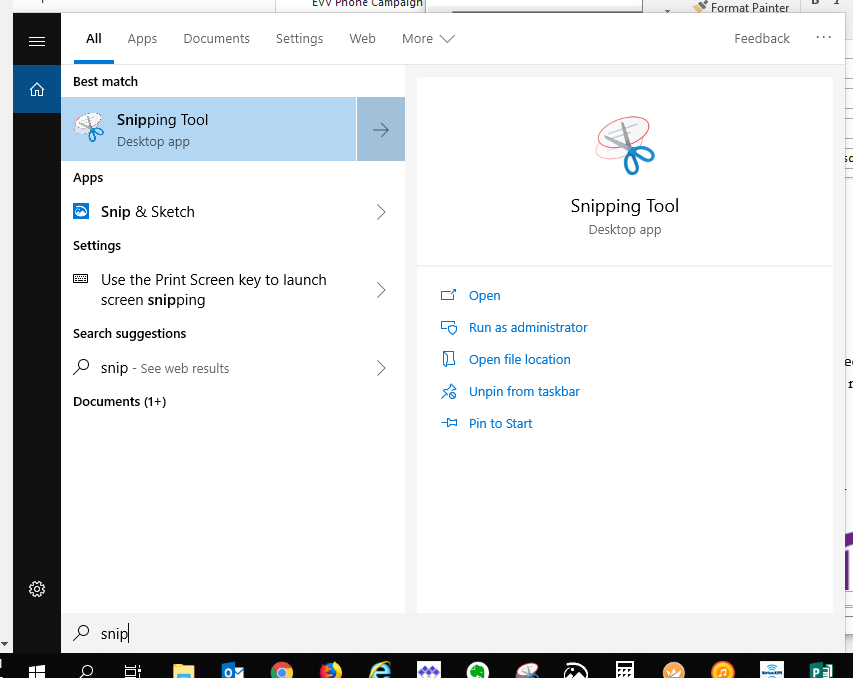
To access this handy tool, click on the Magnifying Glass button and start typing snip. Once the Snipping Tool appears, you can press Enter on the keyboard or click the icon.
This screen will appear. If you’re using Windows 10, you may see the Try Snip & Sketch button as pictured below. Feel free to ignore or try it, if you’re feeling adventurous.
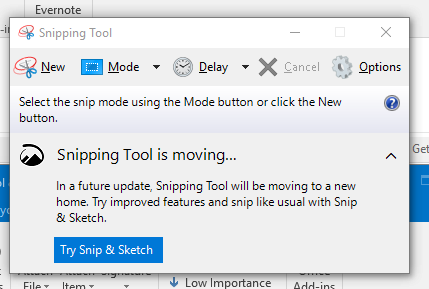
Click the New button. The screen will have a gray overlay with a cropping tool. Draw a box around the DL window. Be sure to include the entire path. If you click on the specific file once before accessing the Snipping Tool, it should be highlighted in the snip as demonstrated in the first screen shot above. Once the captured window appears within the Snipping Tool, you should be able to paste it in the body of an email. You may also save it to your desktop and attach it to the email or ticket.
For even easier access to the Snipping Tool, we recommend pinning it to your taskbar by right-clicking on its icon in the taskbar while the app is open and selecting Pin to taskbar.

You may also find it helpful to view this YouTube video that illustrates the Snipping tool and many of its functions: